Sunday, October 26, 2014

Mystery Quilt - Two Thirds Done

This is late thanks to life happening, but better late than never. I'm part of a Facebook group for quilters and one of the latest projects was a mystery quilt. It's a mystery since you only start with specific yardages in light, medium, and dark fabrics and get a new "clue" (block design) each week. The title is "X Marks the Dot" and was designed by Joie Holcomb of Lamb Creek Farm Quilts and Fabrics.

Clue 1: Contrary Wife blocks


Clue 2: Eccentric Star blocks

Clue 3: 9 Patch with three fabrics

Clue 4: 9 Patch with two fabrics

Clue 5: Sashing and cornerstones.

Clue 6 is the borders and that's what I'm working on now. I still need to cut the outermost border pieces and attach them. The lighter green fabric will be the outer border. That was my project for today, but life got in the way of play time.

Then I'll piece my backing, sandwich the layers, quilt, and bind. I'm honestly not sure I can sandwich and quilt this one on my own with my shoulder still healing. I'll have to wait for a quilting friend to be free to help me before I can finish this one.

I've also fixed the batting issue with my diamond runner and quilted it. It's trimmed up and ready for binding.
That's all for this week. Hopefully next Sunday I'll have the runner bound and the mystery quilt top finished, even if it's not sandwiched/quilted. Ttfn!

Sunday, October 19, 2014

Playing Around

For my birthday FH took me to the local quilt show and I picked up some fun goodies. One was a new pattern for placemats that uses fat quarters. I played with it last week after I remembered four holiday themed fat quarters and matching yardage that was just laying around in my stash.
 The cutting directions rely on the fat quarters being squared up to the same size so you can stack and whack all the pieces. Then it's simply rearranging the order of the stacks in a certain way. The pattern instructions come with a total of five variations of the design. I played with the simplest as my fabrics were fairly busy.
 I started the quilting on this runner and I'm sort of happy with it. I'm thinking about going back and putting in a thicker batting. The stitching doesn't look bad as is, but I think I'd prefer more definition.
 I know I'm going to take this one apart and put in thicker batting. Stitching in the ditch isn't even visible so nothing looks quilted. Kind of irritating, but live and learn.
 I've also done some utilitarian sewing this past week. We have a good friend, P, staying with us as he recuperates from a bad motorcycle accident. He almost lost his left foot, but doctors managed to save it. Currently the dressings leave his toes exposed and since it's getting chilly out, I made him some toe covers that fit just over the bandages without squeezing toes, cutting off circulation, or touching his heel where the skin graft is healing.
He'll be with us on and off for a couple of weeks... basically when he's not expected at one of the doctors' offices back in the city where he lives. His family all lives in this area, but none of them have first floor bathrooms or they have stairs everywhere. Eventually he'll get to go back to his apartment 100 miles or so away, but for right now he's comfortable here.

That's all for now. I've got to go up and see if P needs anything. Take care!

Sunday, October 12, 2014

The Friendship Star Quilt

One of the ladies in my stitching guild moved to Florida this year. She was the editor of our newsletter (for so many years) and very active in the quilting interest group. We, the interest group, decided to make her a gift and invited the guild at-large to participate if they wished. We weren't sure if we'd end up with a wall quilt, a bed runner, a lap quilt, or even a queen-sized.

The rules were simple:
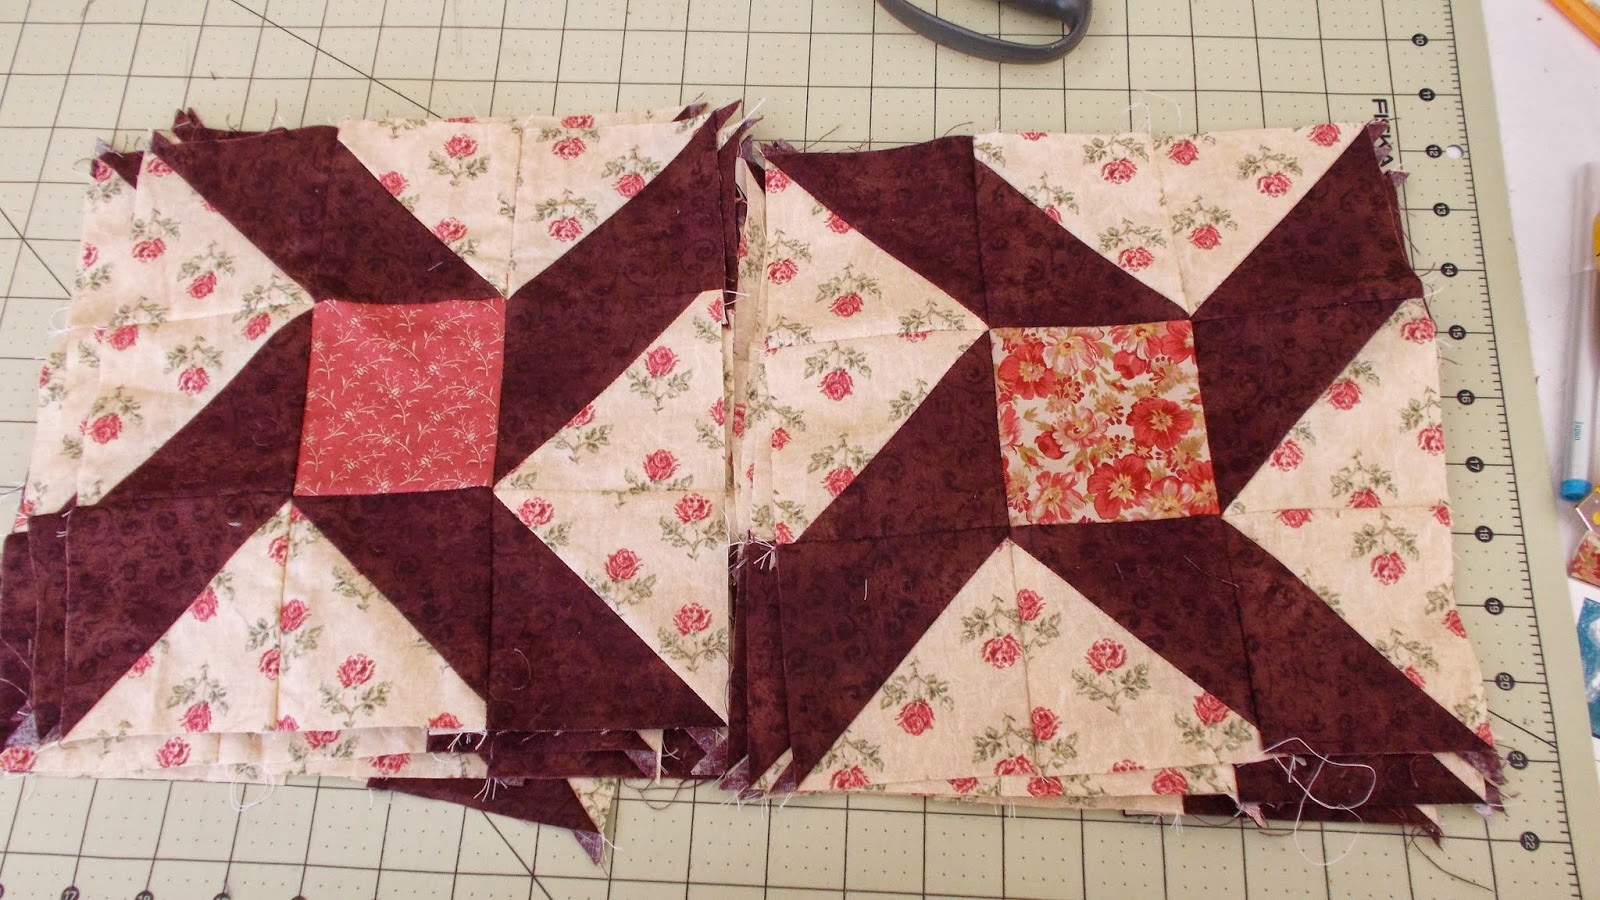
* make a 9.5 inch Friendship Star block (9 inches finished)
* use purple in the quilt block somewhere
* sign your name and/or personalize the block with embellishments of your choice

If someone wanted to participate but didn't know how to or have the time to sew, then if they provided fabric one of us would make their block. I personally sewed eighteen of the blocks. The one below is my block. I cut the tulip applique from a piece of fabric another member purchased for her block. She told me to keep the rest in exchange for sewing it.


The organization of patterns, instructions, etc and getting blocks made/collected was largely my project. After I tore up my back and shoulder in July, the piecing, quilting, and binding fell to the interest group's chairperson. I think she did a lovely job. I've blotted out faces to protect identities, but the lady on the left in pink and black is the recipient. She was back visiting at the last General Meeting and we presented her with the fruits of our labor. The lady in the right in green is the talented chairperson of our quilters' group and did the lion's share of work on the quilt itself.


As you can see, a couple of people missed the part where we were using a specific block pattern and did their own thing. We chalked that up to "personalizing their blocks" and rolled with it. Another lady used the pattern instructions, but arranged the pieces to create a "disappearing" or deconstructed star instead. I'm not sure if that was intended to be different for the sake of being different or represent our friend moving away, but either way I think it's lovely.

There were four blocks left over from piecing the top. By this time I'd recovered enough to turn them into pillows that match. Here'e the fronts and backs after quilting and before I finished the pillows. They happen to be four of the blocks I made. Two blocks (top and bottom right) were done for ladies who wanted to participate but had severe health issues. The other two (top and bottom left) were done in memory of two members we lost within the year.


After I'd pieced the pillow sections it dawned on me I didn't know how the quilting on the quilt was done or what color thread was used, but after a phonecall I was in business. Meandering and lavender were the keys, so I let my mind drift whilst my machine did the work. Apparently I was thinking about my time in university because the quilting ended up looking a lot like topographic maps! ;-)

Each stupid zipper had issues... that took about three hours per zipper to contend with. The results were worth it though. Incidentally, the fabric used in between the light purple solid and the white tone on tone is the quilt backing.


This project was a lot of work and a long time in progress, but it was full of love and the look on our friend's face was totally worth it.

Sunday, October 5, 2014

Classes and Quilts

Last week I taught two miniature workshops on polymer clay foods. Thursday night was breads and Saturday morning/afternoon was candies and cookies.


Everyone had fun and they've hinted strongly at doing more food classes in the near future. For many of them this was their first experience making canes.

I've also recently finished a couple of baby quilts for some friends. The first had to be gender-neutral, contain earth tones, and be cutesy for a baby.

 The second's nursery colors are orange and grey, so I chose a recent fabric that fit the bill perfectly.
I goofed and forgot to get a picture of the back though.

That's all for this week. I have to get back to sewing samples for one of the local quilt shops. Take care!